OPERATOR (USER) IDENTIFICATION TABLES
OVERVIEW: Only those with administrative
permissions can run this program.
( See below
Table Access Field #50 = Y )
The Operator
Identification program allows entry of pertinent operator information and
login/passwords and security levels which may be updated periodically.
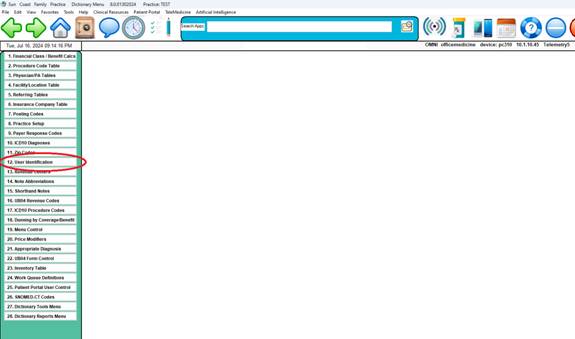
PROCEDURE: From
the Table Maintenance (Dictionary) Menu (Option #4) Select Option #12, Operator
Identification.
EXAMPLE MENU:
After you select Option 12, and select
or enter an operator code, a screen similar to the one below will be
displayed.
Example Non-administrative display:

ENTER CODE:
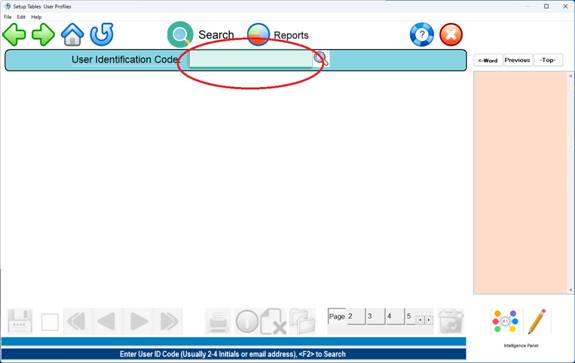
Type in an operator
code using up to 4 digits (any
combination of numbers and/or letters) and press <Enter Key>. An email address can also be used as the
operator login.
Example
Operator Code: KM23
Example email
address: Kylie.Mathews@perfecthealth.com
If the code or email is not on file, the
following message will be displayed.

If
you wish to add this operator, type a Y for Yes . If the operator is already
present in the database, when you enter their code and press <Enter Key>,
that operator's record will be displayed
to your screen. You may correct an
entry, delete an entry, or print a hardcopy of the operator’s record.
(Press <Enter Key> after each
field to enter information in the
next field.) Red = Required
Field.
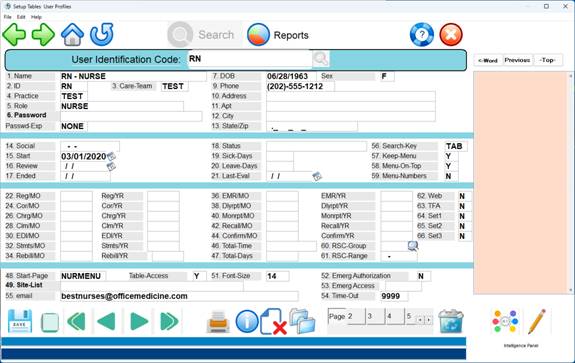
1. Name: Enter the operator's name. Last name then a
comma
and a space and the first name.
2. ID/Code: Enter the operator's badge number.
Indicate a
physician with DOCTOR=001
Where the
001 is the Dr number from the Provider Table.
This setting links the provider table to the
user ID.
3. Care Team: Enter the operator's care team if one is
assigned.
4. Practice: Enter the default practice code (site code)
for this operator.
5. Access: Enter the operator's assigned work level as
per table below.
VIEW: Read Only Rights.
NOVICE: Front desk access
only. Also gives additional help
prompting.
BILLER: Access to Billing and
Posting Functions
ADMIN: Allowed to Setup Tables
and Options
SUPER: Allowed to do file
maintenance and password functions.
NURSE: All EHR Functions and Rx.
MA: Intake and History allowed,
Rx is blocked.
MED: Intake and History, Rx is
blocked.
DOCTOR: All EHR Functions, Rx and
EHR maintenance
TRANS: All EHR functions
except Rx
MEDREC: All EHR functions
except Rx
Note:
Other Custom
Levels can be created using the Password Maintenance Utility
6. Security: If the operator is assigned a password,
enter
password here. Password must be at
least 8 characters in length and
contain 2 or more numbers
7. DOB: Enter the operator's date of birth.
8. SEX:
Enter the operator's sex.
9. PHONE: Enter the operator's telephone number.
10. ADDRESS: Enter the operator's street address.
11. ADDRESS: If the address contains an apartment
number,
enter the apartment number here.
13. STATE/ZIP: Enter a two-digit post office abbreviation
for
the state, then enter the zip code
(this field will hold
up to 13 numbers. You need not insert dashes as that
feature is built into the program.
14. SSNO: Enter the operators social security number
only when required.
15. HIRE_DATE: Enter the date this person was hired.
16. ANN_DATE: Enter the work anniversary date.
17. ENDED: When appropriate, enter the operator's
termination date. Entering a date
in this field disables the operator login.
18. STATUS: Enter the operator's status.
19. SICK_DAYS: Enter the sick days the operator has taken.
20. PERS_DAYS: Enter the number of personal days taken.
21. LAST_EVAL: Enter the date the operator was last
evaluated.
22. THROUGH 47. FIELDS: These
fields are updated automatically
based on work done under the
operator identification code.
48. START PAGE: Optional Menu that is displayed when the
operator
logs in. Example: DOCMENU ( Medical
Records only )
If this field
is blank the full menu of all items will be displayed.
Customized
menus can be made using the Menu Control Table located on the table maintenance
menu. Usually item #19. Example: FDMENU
Once a menu
is created, the code for the menu can be entered into this field.
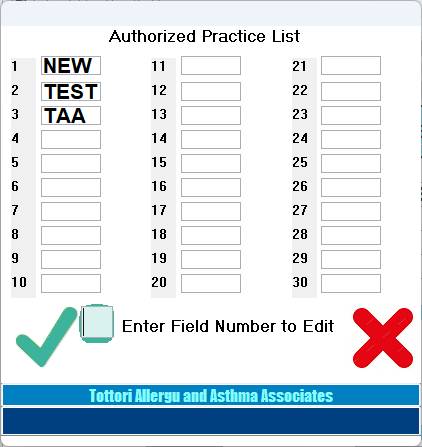
49. SITES: Authorized Practices for this operator. If this field is populated, the operator is
restricted to only the practice codes within the field. If the field is
blank, the operator has access to all practices. This function allows access to multiple practices
simultaneously.
Example
Screen Below:
50. TABLE ACCESS: Entering “Y” in the field gives the operator
access to
general
table maintenance functions located on the #4 Table Maintenance menu.
Example: Add/Change & Delete
Insurance Company Codes.
This requires a Y=YES, N=NO TABLE
MAINTENACE ALLOWED.
51. FONT SIZE: Sizes for type ahead
billing screens 9-18
52: EMERGENCY ACCESS AUTHORIZATION: Y
or N
This function elevates the access level during an system wide
Emergency as determined by the
system administrator.
53. EMERG ACCESS LEVEL: THIS IS THE
LEVEL TO BE ELEVATED
DURING AN EMERGENCY.
Example – MA could be elevated to
NURSE during an emergency.
54. TIMEOUT: NUMBER OF SECONDS FOR A
SECURITY TIMEOUT
55. EMAIL: Outside email address for
the messaging module.
56.
SEARCH-KEY: Options are F2 or TAB. This is the key, when pressed, will search
the table associated with the field.
57.
KEEP-MENU: This field controls whether the menu will remain displayed after
selecting a menu item.
58.
MENU-ON-TOP: This setting keeps the menu visible when other apps are opened.
59.
This setting causes menu item numbers to be displayed before the description.
60.
A virtual office code for a Department within a Practice can be defined here.
Example: Shot Room
61.
A resource range for a virtual office is defined here. Example 100-199
62.
“Y” in the field will enable website access.
63. This setting forces Two Factor Authorization
for each login.
After you have completed the screen, an
Action Toolbar will be
displayed at the bottom of the
screen. You may reach the
Action Toolbar aat any time by pressing
the <Escape> key.
DEFINITIONS
OF THE ACTION LINE FUNCTIONS FIELD:
ACTION: Enter field
# to Correct
Enter
# to Correct: Enter the number
of the field you need to
correct and press <Enter>. The cursor will move to the first
character on that line (information on
that line will not be
erased). You may retype the entire
line, or position the cursor
on the character that needs
correcting. Press <Escape> or <Home>
to go
back to the Action Line functions
field.
(P)rint: Type P and press <Enter Key> to print a
hard copy of the
information. The system will open a window in the middle of
your
screen listing output devices. Please see the example below.
EXAMPLE SCREEN: 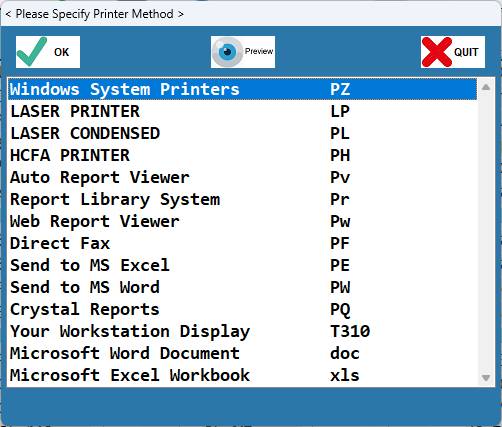
Type in the number of your selection at the flashing cursor and press <Enter Key>.
You may also use the <Up>/<Down> Arrow keys to highlight your selection and then press <Enter Key>.
(F)orward: To go forward one code (numerically or alphabetically), type F and press <Enter Key>.
(B)ack: To go back one code (numerically or alphabetically), type B, and press <Enter Key>.
(K)opy: To make a copy of this information (be sure you press Escape to save it before you copy and assign it a different Code)
type K and press <Enter Key>. The cursor will move to the ENTER CODE prompt. Enter the Code you wish this information copied to and press <Enter Key>.
(D)elete: If you want to delete this record from the system, enter a D and press <Enter Key>.
(V)erify: Type V to verify the original entry date and/or the date this screen was last updated. Esc=END: To exit and save your information, type Escape and press <Enter Key>. The cursor will return to the ENTER CODE prompt. You may continue entering other codes, or type 0 (zero) and press <Enter Key> again to go to the Dictionary Menu.
SEARCH: To search for an operator in the system, enter the first few letters of the last name at the ENTER CODE prompt and press <Tab>. A window will open in the middle of your screen listing operators alphabetically beginning with the letters you entered. To make your selection, at the flashing cursor type the number to the far left of the name and press <Enter Key>, or highlight the line using the <Up>/<Down> Directional Arrow keys and then press <Enter Key>. Please see the example below.
EXAMPLE SCREEN: SELECT or SEARCH:
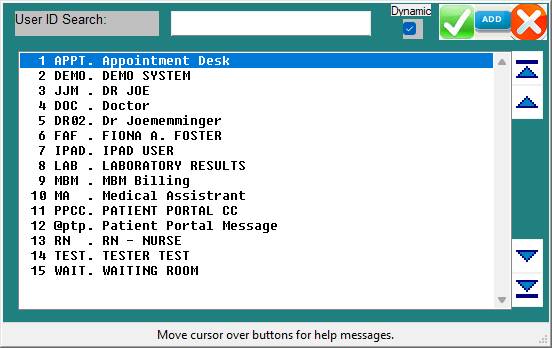
You may use the Up & Down arrows, or click on the name of the operator identity that you want to select.