OVERVIEW: The Patient Statements program runs the statement module called
Laser Statements. This program allows you to prepare and print patient statements for individual patients or for all patients in the system with a balance. You may produce short, concise statements displaying only unpaid patient balances or full detail patient and insurance statements
displaying all activity on a particular account.
Statements may be sorted and printed several different ways. The sort
selections are: Patient’s Last Name, Physician, Zip Code, Site, Account
Number, and Coverage Code.
The monthly statement printing options include the following:
OMNI 5 PART SELF MAILER, OMNI SINGLE PART FORM,
PLAIN LASER PAPER STATEMENT and the ELECTRONIC STATEMENT (EDI) FORMAT.
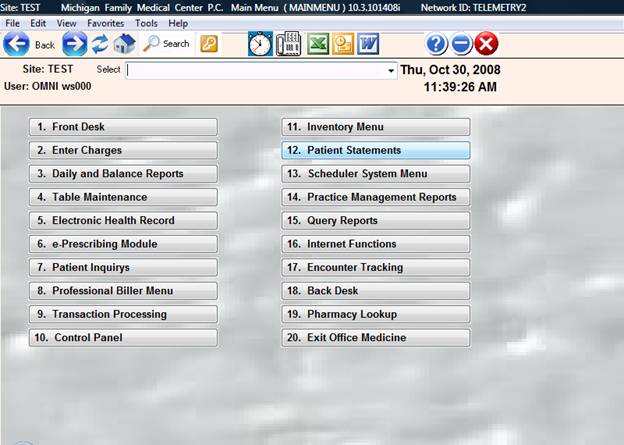
PROCEDURE: From the Main Menu select Option 12, Patient Statements, and <Enter>.
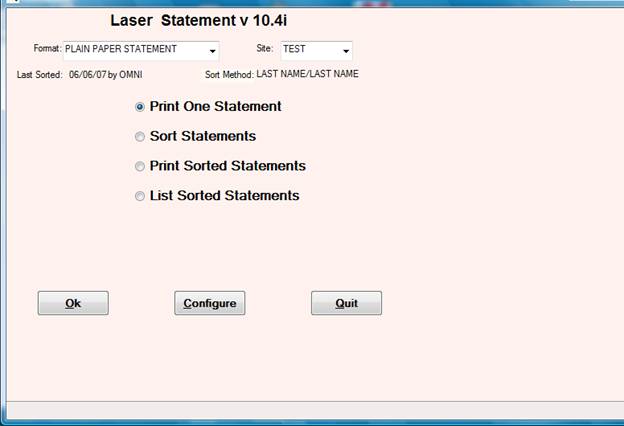
<Format> box of the LASER STATEMENTS screen displays the current format selection. To change the format select CHANGE FORMAT, and <Click>. Each time you select “Change Format” a list of the available formats will be displayed.

1. PRINT ONE STATEMENT:
Allows you to print a single statement for one patient account. You will be asked to select a Destination.
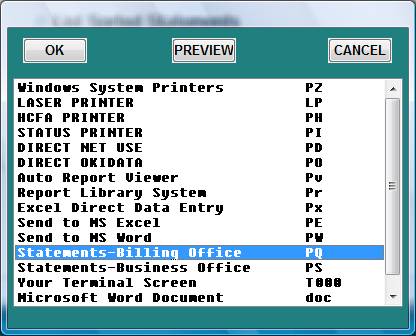
Select the appropriate Destination and <OK>. Next, the bottom of the screen will display the Site code you are working in and the patient prompt. The SITE prompt will only be displayed if you are working with multiple locations.
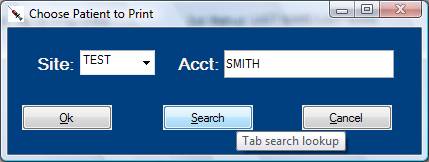
Enter the patient’s account number and click “Search”.
Working . . . (Displays site and account number.)
Shortly thereafter the statement will print.
2. SORT STATEMENTS:
Allows you to sort all outstanding patient accounts by Patient’s Last Name, Physician, Zip Code, Site, Account Number, and Coverage Code.
Sorting does nothing more than select accounts (based on Site, minimum balance, and the Patient Information BILLS field) and order them according to your primary and secondary sort.
Once this sort file is created, EVERY ACCOUNT IN THE SORTED LIST will receive a statement. You can print the statements as often as you like without re-sorting unless you change your sort criteria (i.e., you need a different Site or different minimum balance).
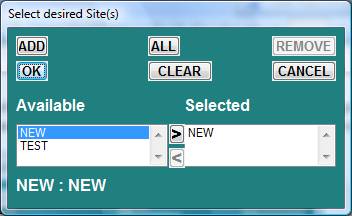
When you select Option 2, you will be asked to enter the Sites to process if you have multiple Sites. You may process all Sites, or you may select specific Sites to process.
If you have only one location, the Site List screen will not be displayed. The system, instead, will take you directly to the sort parameters screen shown below.
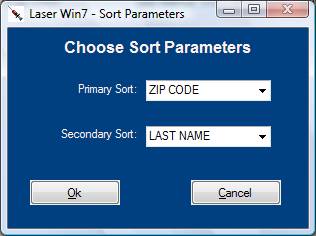
SELECT PRIMARY SORT, OR CANCEL TO GO BACK
SELECT SECONDARY SORT, OR CANCEL TO GO BACK
DEFINITION OF SORT SELECTIONS:
1. LAST NAME: Sorts alphabetically by the patient’s last name. Since this is the default setting, just press <Enter>.
2. PHYSICIAN: Groups patients together by physician number. (Not Site specific.)
3. ZIP CODE: Sorts patients by zip code, grouping patients with same zip code together.
4. SITE: Patients will be grouped together by Site.
5. ACCOUNT NUMBER: Sorts patients by account number putting account numbers
in numerical order.
6. COVERAGE CODE: Sorts patients by coverage/benefit code. (This is the coverage code in Field 13 of Patient Health Profile.)
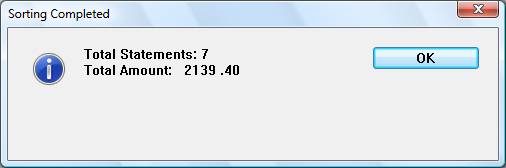
Using the above selections, you will enter the primary and secondary sorts. The system will begin scanning accounts and display the percentage of accounts being scanned as the scanning bar indicates the progress until it reaches one-hundred percent complete.
The number of accounts scanned and the number of those accounts that met your sort parameters will be displayed at the bottom of your screen.
3. PRINT SORTED STATEMENTS:
Allows you to print a file that you sorted using the SORT STATEMENTS option.
Note: Be sure you are in the correct <Format> selection. The <Format> box of the LASER STATEMENTS screen displays the current format selection. To change the format, select CHANGE FORMAT, and <Click>. Each time you make this selection, one of the formats will be offered. The Plain Paper format is most commonly used for printing on plain paper vs a pre-printed statement. – Expressbills must be sent using the “PLAIN PAPER” format.
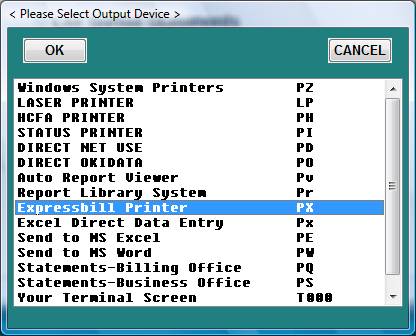
After you select this option and <Enter>, the system will open a window displaying the available Output Destinations. (Printers)
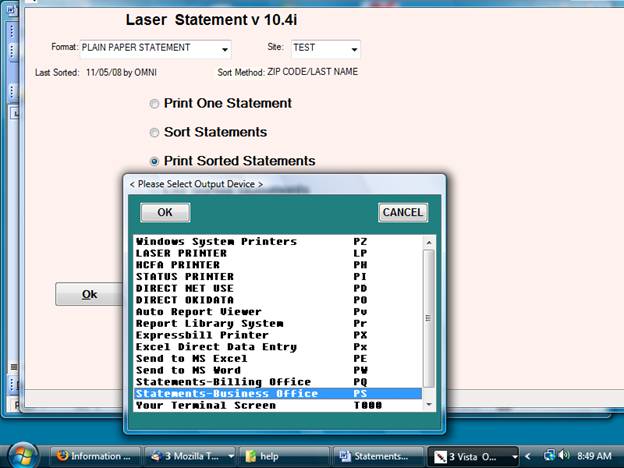
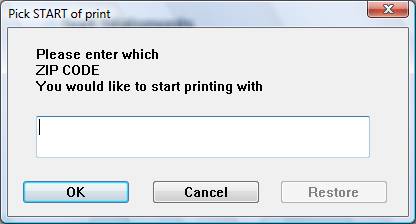
Select the appropriate Destination and <Enter>. Next, enter how you want the statements printed. If only part of the batch is to be printed, the FROM and TO parameters must be set.

If your print date is different from the sort date, the system will open a window asking you to confirm the sort run.
How to enter the FROM/TO parameters.
PATIENT LAST NAME:
If you want to sort A through B (and include B), your entry would be as follows:
LAST NAME FROM: A________ TO: BZ________
The addition of the Z tells the system to include patients whose last names begin with B and include all letters in between up to an ending letter of Z.
PHYSICIAN:
Enter the Physician ID number you wish to begin with and then enter the Physician ID number you wish to end with. The ending Physician ID number is included in the printing.
PHYSICIAN FROM: 001________ TO: 003________
ZIP CODE:
Enter the zip code to begin with. Enter the zip code to end with. The ending zip code is included in the printing.
ZIP FROM: 48043________ TO: 48045________
SITE:
Enter the Site to begin with. Enter the Site to end with. The ending Site is included in the printing.
SITE FROM: AAAA________ TO: AHAH________
ACCOUNT NUMBER:
Enter the account number to begin with. Enter the account number to end with. The ending account number is included in the printing.
ACCOUNT NUMBER FROM: 000010_______ TO: 000080________
COVERAGE CODE:
Enter the coverage code to begin with. Enter the coverage code to end with. The ending coverage code is included in the printing.
COV CODE FROM: C________ TO: H________
EXPRESSBILL OPTION:
To use the Emdeon/ExpressBill electronic statement service,
select the “Expressbill Printer” when sorting the statements.
After printing statements to this device – the statements will automatically be prompted to be sent to Emdeon. Click “OK” to transmit the statements or Cancel.
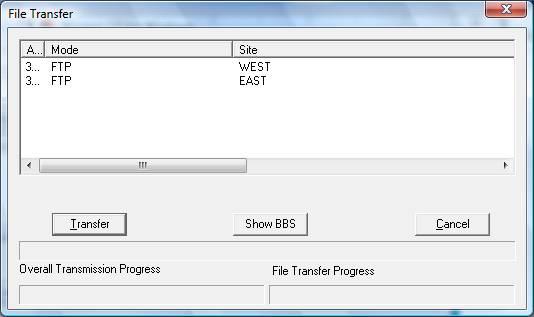
A confirmation will appear regarding the EDI process.
4. LIST SORTED STATEMENTS:
Allows you to print a concise listing of the statements to be printed. This list simply prints the primary/secondary sort fields, account number and balance for each account in the sort file. The end of the report shows the total number of statements as well as the total dollar amount. If the primary sort field is by SITE, the report will print per Site totals after each Site.
This report is useful to determine the account balances before statements are generated. If these balances do not seem to reflect your minimum, it is a good sign that it is time to re-sort.
When you select Option 4, you will be prompted to select a Destination.
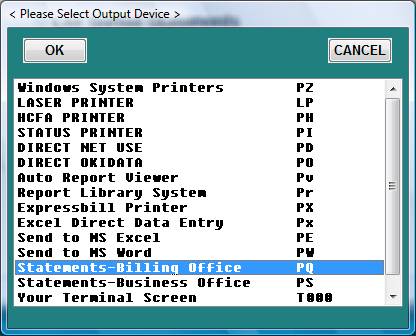
Select the appropriate Destination and <Enter> or click OK. This report should print immediately.
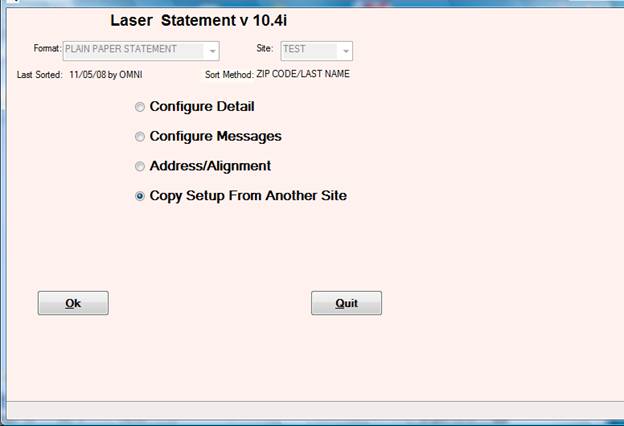
5. STATEMENT CONFIGURATION:
This selection allows you to change the options and default settings before printing the statements. These options fall into four basic categories:
DETAIL, MESSAGES, ADDRESS INFORMATION,
COPY DEFAULTS FROM ANOTHER SITE.
All configuration options are stored specific to SITE and FORMAT. Example: SITE AAAA
may have settings for PLAIN PAPER format, separate from SITE AAAA settings for the 5-PART
MAILER, both of which are separate from any other format option under any other Sites.
After you select Option 5, the Statement Configuration menu will be displayed.

An explanation of each option begins on the next page.
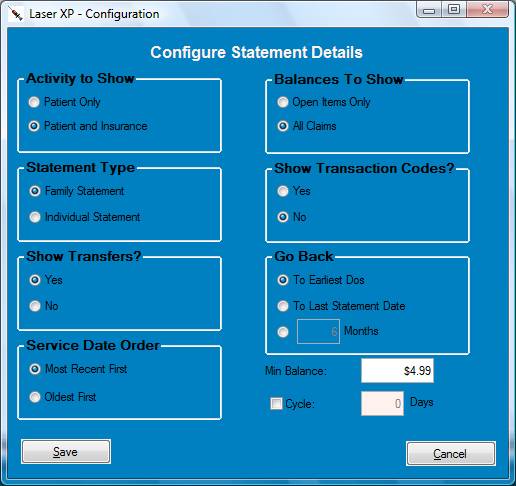
(1) CONFIGURE DETAIL:
This selection contains options that affect the DETAIL section of the statement. Specifically,
which claims/dollar amounts/transactions will be included on the statements. All options are either Toggles (selecting the option number will cause the setting to change to its next available setting) or Input (selecting the option number will cause the system to prompt you for information). The options are shown below.
|
OPTION |
DEFAULT SETTING |
|
|
|
|
1. ACTIVITY |
PATIENT ACTIVITY ONLY |
|
(Toggle to set statements to include only patient activity or both patient and insurance activity.) |
|
|
|
|
|
2. TYPE |
FAMILY STATEMENT |
|
(Toggle to print one statement for entire family or an individual statement for each family member. Only relevant to family accounts.) |
|
|
|
|
|
3. BALANCES (Toggle to set statements to include all claims, regardless of outstanding balance, or open items only—only those claims that do not have a balance of $0.00.)
|
OPEN ITEMS ONLY
|
|
OPTION |
DEFAULT SETTING
|
|
4. TRANSACTIONS (Toggle to show only description of transaction, i.e., CASH PAYMENT. Or both in-house code and description, i.e., CASH PAYMENT C.)
|
SHOW DESCRIPTION ONLY |
|
5. TRANSFERS |
DO NOT SHOW ON STATEMENT |
|
(Toggle to hide transfer description or show transfers—any transaction with a function 7. Setting has no financial effect on statement balance.)
|
|
|
6. GO BACK |
TO EARLIEST DOS |
|
(Input to set the statement period. All claims from present back to the beginning of the statement period will be presented, and any remaining balance not explained by the detail presented is shown as a balance forward.) |
|
|
|
|
|
7. DOS |
MOST RECENT DOS FIRST |
|
(Toggle to show claims from present backward to oldest date of service, or from oldest date of service forward to present.) |
|
|
|
|
|
8. MIN BALANCE |
$1.00 |
|
(Input to set the minimum account balance that qualifies an account to receive a statement during a sorted batch print. This field is meaningful only for sorted statements. It has no effect for PRINT ONE STATEMENT.) |
|
|
|
|
|
9. CYCLE |
NO CYCLING |
|
(Input to show no cycling or the number of days for your billing cycle.) |
|
|
THE STATEMENT FORMAT YOU CHOOSE DETERMINES WHICH OF THE ABOVE SETTINGS WILL BE DISPLAYED.
|
|
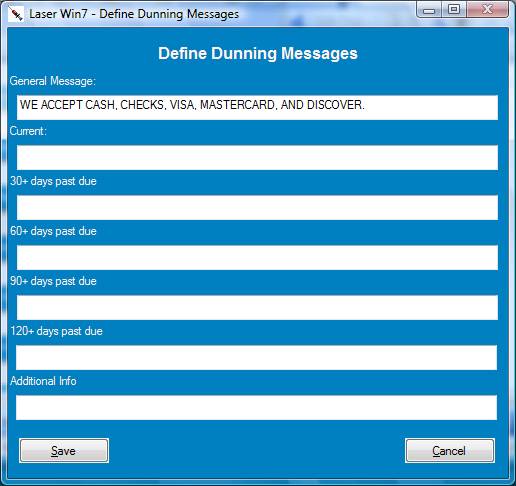
(2) CONFIGURE MESSAGES:
This controls settings for statement messages These settings will not in any way affect the detail or financial activity of statements.

|
OPTION
|
DEFAULT SETTING |
|
1. DEFINE DUNNING MESSAGE TEXT All seven possible messages are defined under this option. Line 1 and 7 contain general text that will appear on all statements. Lines 2 through 6 contain dunning information, of which only one will appear on the statements (these messages are used based on the calculated age of the account, whether current, 30, 60, 90, or 120 days past due).
GENERAL MESSAGE ( LINE 1) DUNNING MESSAGE (LINE 2, 3, 4, 5 OR 6) ADDITIONAL INFORMATION (LINE 7)
|
|
|
2. DUNNING (Toggle to calculate dunning message based on age of unpaid balance (30-60-90), or delinquent date (date of last patient payment), or to turn off messages entirely.
|
PER AGED BALANCE (30-60-90) |
|
OPTION
|
DEFAULT SETTING |
|
3. DUE DATE (Input field to calculate the due date to be printed on statements—number of days.) |
16 DAYS (10/05/96) |
|
|
|
|
4. AGED BALANCE (Toggle to set the 30-60-90 aged balances to print in the statement header (top of statement), footer (bottom of statement), or not at all.
|
IN STATEMENT FOOTER |
|
5. HOW-TO-READ (Toggle to print/do not print a small How-To-Read disclaimer. Useful on the first run of a new format to advise patients of the change.)
|
OFF |
|
6. FOOTER (Toggle to print the header at the bottom of the last page of the statement or directly after the detail on the last page.)
|
BOTTOM OF PAGE |
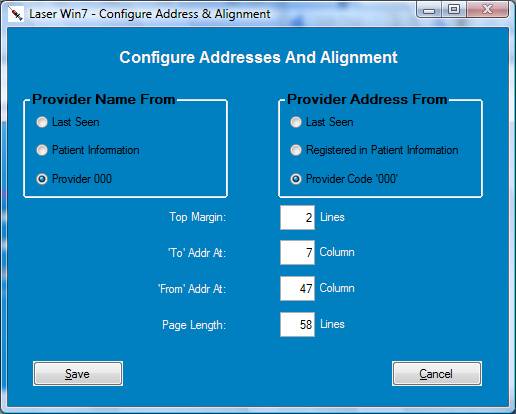
(3) ADDRESS/ALIGNMENT:
This controls how the address information is presented. You can set not only where the address appears on the statement, but also where in the Provider Dictionary the address will be read.
|
OPTION |
DEFAULT SETTING |
|
|
|
|
1. PROVIDER NAME (Toggle to set name [provider’s From: address] to be read from the provider set for a particular account in Patient Information, or from the last provider seen, or always from Provider 000 in a particular Site.
|
PATIENT INFORMATION |
|
2. PROVIDER ADDRESS (Same as above, except that this option controls the address and tax ID information—bottom lines of provider’s From: address.)
|
PATIENT INFORMATION |
|
3. TOP MARGIN (Input field to set the vertical distance between the top page header and the top line of the address.)
|
4 LINES |
|
4. ‘TO’ ADDRESS AT (Input field to set the horizontal distance (in characters) between the left edge of the statement and the “TO” address..
|
COLUMN 7 |
|
5. ‘FROM’ ADDRESS AT (Same as above, except that this option controls the “FROM” address.)
|
COLUMN 50 |
|
6. PAGE LENGTH (Input field used to set the number of lines that can print on one page before the printer advances to the next page. GENERALLY, THIS OPTION CAN BE LEFT ALONE. 58 LINES IS A SAFE, STANDARD SETTING.)
|
58 LINES |
|
|
|
|
|
|
(4) COPY DEFAULTS FROM ANOTHER SITE:
Once settings have been established for one Site, you may wish to copy these settings to other Sites. Simply change the current Site to whichever Site you wish to set and use this option to copy the settings from whichever Site is correctly configured. Window below opens.
Enter the Site you are copying the defaults from (not the Site you are working in) and <Enter>. The following will be displayed to your screen upon exiting the LASER STATEMENTS program.
6. CHANGE FORMAT:
Allows you to toggle through the available statement formats on your system.
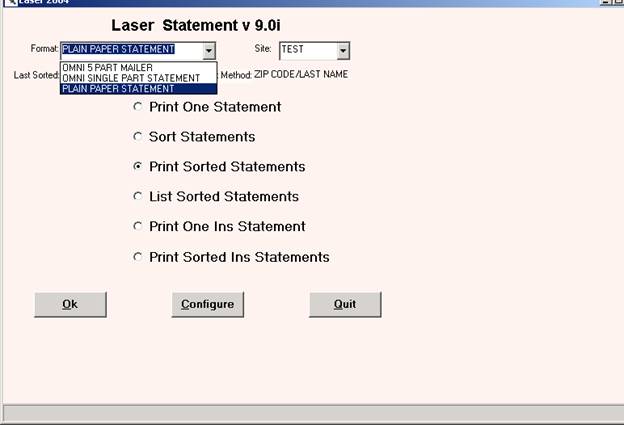
The box labeled <Format> displays the format currently in use. The displayed setting is also stored as the format for the current Site upon existing LASER STATEMENTS.
STANDARD FORMATS ARE:
#1 OMNI 5 PART MAILER
#2 OMNI SINGLE PART STATEMENT
#3 PLAIN PAPER STATEMENT
#4 CUSTOM FORMAT
Your system may have additional formats. For example, if you have contracted OMNI programming for custom statement forms.
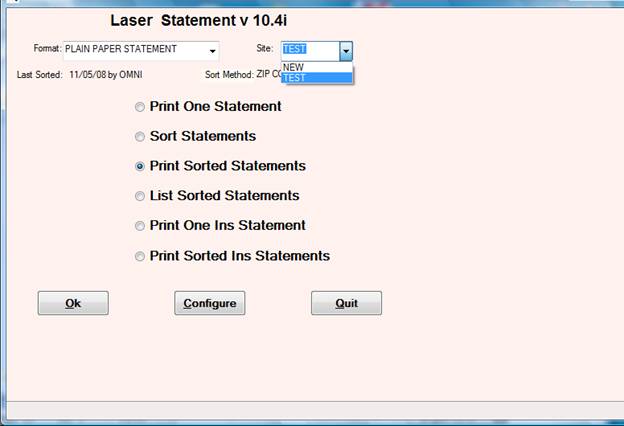
7. CHANGE CURRENT SITE:
Allows you to select a different Site without exiting the LASER STATEMENTS program. This option is most useful when working with Statement Configuration for multiple Site practices.
After you select this option, your cursor will move to the CURRENT SITE prompt and allow you to enter a different Site. The cursor will then return to the ENTER OPTION prompt.
If you <Tab> at the CURRENT SITE prompt, the system will take you into the Database screen for the Site that is displayed. To return to the LASER STATEMENTS Menu from the Database screen, select “QUIT” .
Options and Toggles:
ACTIVE=<active format list> (default=123)
Use to designate a custom list of active formats. PATHSTM will
only attempt to toggle through numbers listed here. For instance,
For a client who has no need for single-part forms, but has a
custom format #4, set ACTIVE=134
AGEBY=[DOS|DOE] (default=DOS)
Controls aging method. AGEBY=DOS will age claims by DOS
for original charges (switches to DOE on transfers), while
AGEBY=DOE will age claims by DOE always.
CLAIM_FILED=[NO|YES|INS] (default=YES)
Controls "CLAIM FILED WITH <carrier>" message on statements which
display both patient and insurance activity. If set to NO, this
message will not appear. If set to INS, will not print
"CLAIM FILED WITH NONE".
CLAIMS_ONLY=[NO|YES] (default=NO)
If set to YES, statement will ONLY display transactions which
are specifically applied to an existing claim. Any transactions
applied to a non-existent date of service will be skipped.
CLMDATE=[DOS|DOE] (default=DOE)
Sets the rightmost date of CLAIM LINES to be either the
DATE OF SERVICE for that claim line or the DATE OF ENTRY
for the claim.
CONTRACTUAL=<description> (default=CONTRACTUAL ALLOWANCE)
Set to override canned-in description of the auto-adjustment.
In this setting, use underscores in place of spaces. For example,
set CONTRACTUAL=AUTO_ADJUSTMENT will print "AUTO ADJUSTMENT" in
place of "CONTRACTUAL ALLOWANCE"
DATEPROMPT=[NO|YES] (default=NO)
Enables prompt for date range; statements will print for
dates of service only within this range.
DATERANGE=[OLD|NEW] (default=NEW)
The "GO BACK TO" date used to cause the statement to
print only DATES OF SERVICE within the date range.
The new logic will also print transactions with a DATE
OF ENRTY within the date range. This new logic makes
the above RECENT_TX toggle obsolete. RECENT_TX, even if
specified, is only valid with DATERANGE=OLD
DRADDR=[CLINIC|NAME] (default=CLINIC)
Normally, the top line of the provider address is the clinic
information (line 3 of provider information). Use DRADDR=NAME to
force statement to use the NAME instead
DR_SUFFIX=<suffix>
Use if needed to add a suffix after the CLINIC NAME in the "From:"
Address
EARLIEST=mmddyyyy
If this switch exists, and the date set here is more recent than
the earliest date set for this statement run, this date will
override. In other words, no statement detail is presented before
this date. Instead, a "BALANCE FORWARD" claim is created
EMDEON=<PRINTID>
** THIS IS ABSOLUTELY VITAL FOR ALL EMDEON CLIENTS **
PATHSTM prints to expressbill files in a more rigid, more easily
program-analyzed format. You *MUST* set the EXPRESSBILL= option
so that PATHSTM can detect when a client is printing to the
expressbill device. For instance, most clients use PX for
expressbill, so the setting should be EXPRESSBILL=PX
FILTERCOV=<list>
Allows sort process to filter accounts, SORTING ONLY THOSE
with a coverage code in this list. EXAMPLE: to sort only
accounts with coverage codes of A, W, Z, or n, install the
follwing toggle: FILTERCOV=AWZn
FIRSTNAME=[FIRST|LAST] (default=LAST)
Sets patient name in PATIENT ADDRESS field to print first name
first (JOHN DOE) or last name first (DOE, JOHN)
FORCEBREAK=[NO|YES] (default=NO)
Can force a linefeed to print between dates of service.
FORCELINE=<col1>-<col2> (default=0-0) (5 PART MAILER: 10-145)
Can force a line to print between dates of service.
Useful for custom statement formats. Line prints from
column <col1> to column <col2>.
NOTE THAT 5 PART MAILER HAS A DEFAULT SETTING OF 10-145
GETAGE=[OLD|NEW] (default=NEW)
Determine whether 30-60-90 aging is performed using
GETAGEA/GETAGEF (old), or GETAGE2 (new)
Note that the NEW 30-60-90 figures will not match the standard
30-60-90 patient aging report.
HEADER_PAGE2=[NO|YES] (default=NO)
By default, PLAIN PAPER format only prints the address information
on the first page of a statement. Set this toggle to YES to force
full header information on all pages.
HIDE306090
Disables "Aged patient balance"; overrides menu setting.
HIDEICD9=[NO|YES] (default=NO)
Suppress printing of ICD-9 codes
HIDE_CPT=[NO|YES] (default=NO)
Allows removal of CPT code from statement detail
HIDE_DOE=[NO|YES] (default=NO)
Allows removal of DOE from statement (rightmost date in detail)
HIDE_FX6=[NO|YES] (default=NO)
Suppress printing of any function 6 transactions
(patient writeoff)
Since these transactions have a financial effect on statements,
the adjust amount is instead deducted from the charges reported
for each claim line.
HIDE_FX8=[NO|YES] (default=YES)
Same as HIDE_FX6, except that it applies to function 8
Transactions
(insurance writeoff)
HIDE_PTAMT=[NO|YES] (default=NO)
If set to YES, all patient dollar amounts are "hidden" and
are instead printed as 0.00
INDSTMT
Existence of this toggle enables two additional menu options:
PRINT INDUSTRIAL STATEMENT and PRINT SORTED INDUSTRIAL STATEMENTS.
These are very similar to PLAIN PAPER, PATIENT & INSURANCE ACTIVITY
statements, with some minor changes in the amount and type of
presented.
INDSTMTADDR (used in conjunction with INDSTMT, above)
Existence of this toggle indicates that INDUSTRIAL STATEMENTS
should include the PRIMARY INSURANCE CARRIER address.
INS_CLMBAL=[NO|YES] (default=YES)
Enables "Carrier balance for claim" at end of each claim in
statement detail.
INS_EA=[EA|TC] (default=TC)
Determines whether insurance original charges will bet set from
CLM.EA or CLM.TC; setting this switch to CLM.EA will prevent the
"CONTRACTUAL ALLOWANCE" message from appearing on statements
INS_TOTALS=[NO|YES] (default=NO)
If set to YES, the footer of PLAIN PAPER STATEMENTS will include
grand totals of insurance charges, payments, and adjustments.
LINKMRN=[NO|YES] (default=NO)
Enables printing of statements across Sites. Any account with
a matching MEDICAL RECORD NUMBER is linked to the statement
being printed.
MAXPAGE=<val> (default=1)
Sets MAXIMUM number of pages to print for custom statements.
MINBAL=[INS|PT] (default=PT)
For statements including both patient and insurance activity,
use this to determine whether minimum balance requirement (for
sorted statements) will be based on patient or insurance balance
NOBILLS=<list> (default=NC)
No statements will be sent to accounts with a PTINFO.BILLS
setting of any of these values
OPENONLY=[NO|YES] (default=MENU SETTING)
Overrides menu setting of OPEN ITEMS ONLY or ALL CLAIMS
PERCENTBAR=[NO|YES] (default=YES)
Enables/disables the ESTIMATED TIME/PERCENTAGE BAR
PT_CLMBAL=[NO|YES] (default=YES)
Enables "Patient balance for claim" at end of each claim in
statement detail.
RECENT_TX=[NO|YES] (default=NO)
** NOTE ** This toggle is obsolete. See DATERANGE
If statement detail does not go back to earliest date of service,
certain transactions may not appear on statement due to a date of
service falling outside the statement period. Set RECENT_TX=YES
to print a section for RECENT TRANSACTIONS APPLIED TO DATES OF
SERVICE OUTSIDE OF STATEMENT PERIOD. This section will report all
transactions with a date of ENTRY within statement period, but a
date of SERVICE which is NOT. Also, this section will accumulate
all patient payments of the same transaction code with the same
date of entry. Thus two $10 cash payments entered on the same day,
applied to two dates of service, will be reported as $20 cash
payment.
RUN_BY_CAR=[NO|YES] (default=NO)
Enables printing of ONLY transactions which apply to a particular
insurance carrier. If ONE STATEMENT is printed, a pick list is
displayed allowing user to select from among all carriers defined
for the account. When running SORTED statements, the statement
will display all information for the PRIMARY insurance carrier for
each account.
When using this function, any claim which is no longer assigned
to the carrier will be printed with a pseudo adjustment indicating
that the balance has been transferred to another carrier.
SEND0BAL=[NO|YES] (default=NO)
Controls whether system will send out statements for accounts with
no outstanding balance. Note that the MIN_AMOUNT setting will allow
user to print credit balances; if this amount is set to a negative
number, 0 balance statements will print if SEND0BAL=YES exists.
This toggle is intended for future development in combination
with sending based on recent activity.
SENT_MSG=[NO|YES|306090] (default=YES)
Determines whether system will add ledger notes stating
"PATIENT STATEMENT SENT ON <date>"
If set to yes, the note abbreviation used is PTSTM
If set to 306090, the note abbreviations are 01,02,03,04,05
based on the dunning message used.
SHOW0CHARGE=[NO|YES] (default=NO)
Controls whether claim detail will include claim lines with no
associated charge
SHOWPATIENT=[NO|YES] (default=YES)
Can be set to turn off printing of patient name in the detail
of statements. Useful for sites with no family accounts or
sites which print individual (as opposed to family) statements
SHOW_DR=[NO|YES] (default=YES)
Controls the appearance of "Doctor" in the claim detail section
of the statement. Many single-physician sites set SHOW_DR=NO in
order to have more readable claim detail
SHOW_TRAN=[NO|YES]
Overrides menu setting of SHOW TRANSFERS
SHOW_TX_CODES=[NO|YES]
Overrides menu setting of show transfer description only, or
show transfer code and description.
SINGLESITE
If this switch exists, single-Site systems (i.e. STBL("TYPE")="S")
will not print the SITE NAME in the account number at the top
of the statement
SORT_BY_CAR=[NO|YES] (default=NO)
If set to YES, enables sorting of statements by insurance carrier
code and/or group. This was designed as a toggle in anitcipation
of the possibility that this feature be included as part of an
additional-fee package.
TAX_ID=[YES|NO] (default=YES)
If set to NO, the tax identification number of the provider/clinic
Will not be printed on the patient statement.
TEAROFF=[YES|NO] (default=NO)
If set to YES, enables a "tear-off stub" at the footer of the
PLAIN PAPER statement. Also, account number prints in the footer
for office use when stub is returned
TIMEOUT=<value> (default=300)
Controls how many seconds the program will wait before returning
the "Printer Not Ready" message window
TOP_MARGIN2=<val> (default=0)
Allows for an extra "margin" between the bottom of the address
and the top of the statement detail (normally this is only
one line). Without this, the only margin that can be set is
between the top of the header and the addresses.
USE_SUB_ADDR=[NO|YES] (default=NO)
If set to YES, statement will be sent to name/address in
primary insurance subscriber information instead of patient.
Guarantor information, if defined, will still override this
address.
WAIT=<waittime> (default=0)
Use this switch to set a delay (in seconds) between each statement
generated. This is sometimes necessary for systems with extremely
bad hardware/software communication, in which characters are lost
when the printer buffer becomes full. Usually this indicates a
deeper hardware problem which should be addressed.
Additional Features:
1. WRITE STATEMENT SETTINGS AS DEFAULTS.
With very few exceptions, users should have statement
settings for every single Site in the system. Some larger
multi-specialty sites opposed this option, so we created a
"set default" command. Enter * at the PATHSTM MAIN MENU
to write the CURRENT statement settings to a default
record, and any Site with NO settings defined will use
this default setting. This may be done as many times as
is necessary if changes are made.
2. SORT CREDIT BALANCES ONLY.
Enter a dash (-) at the PATHSTM MAIN MENU to toggle
CREDITS ONLY mode on or off. In CREDITS ONLY mode,
the minimum balance setting is ignored, and the system
will create a sortfile containing any account with a
patient balance < $0.00 ( CREDIT BALANCE )to be printed.
3. MULTPLE STATEMENTS FOR PARENTS.
In cases where each parent of a child would like to receive
a statement, add “R.S.” – ( Repeat Statement ) to any of the
message/option fields for the master member demographics.
This option will print another statement for each parent’s
Address as defined in the guarantor screen for each child.