Electronic Medical Records - TEMPLATE LIBRARY
Electronic Medical Records - TEMPLATE LIBRARY
OVERVIEW: The Template Library program is used to create and maintain standard data entry forms or "Templates" used for the documentation of histories, physicals, plans, diagnostic results, and other pertinent patient medical information. The term entry FORM and TEMPLATE simply describe a method to arrange pre-selected fields and their associated choices into a screen for data entry purposes.
Templates are made by using a simple word processor type of program in order to layout the screen and create fields for any procedure or purpose.
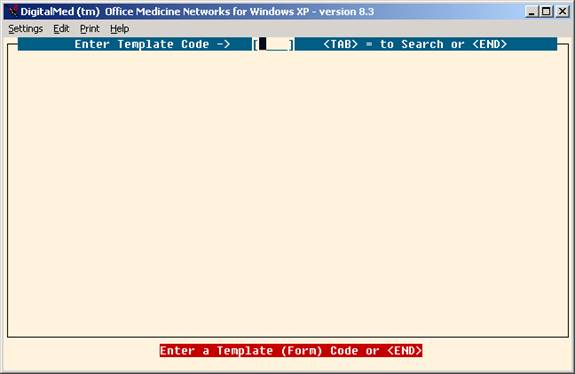
PROCEDURE: From the Patient Medical Record Menu (#5) select Option 2, Template Library ( or Entry Form Library ), and press <Enter>. The screen below will be displayed.
Introduction Screen:
Until you have forms entered into the Entry Form Library, the
Search Screen will appear without entries. When you have forms on the database, the Summary Search will contain a list of the forms as shown in the following example.
EXAMPLE SEARCH SCREEN:
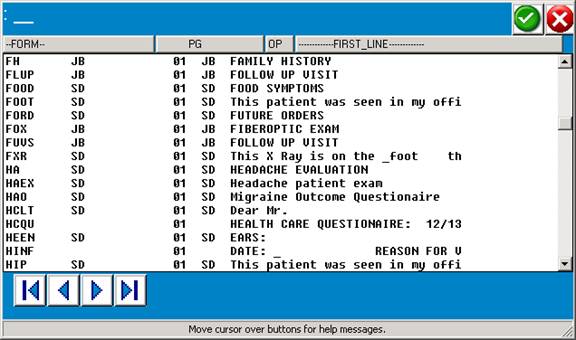
FIELD DEFINITIONS:
FORM—Lists the code which identifies the form.
PG—The actual number of pages contained in the form.
OP—The operator or user ID of the person who was the last one to update this form.
FIRST LINE—The first line of text on each form.
As you add templates to the Library, they will be displayed to the Summary Screen. The first line of every template is shown on the Search Screen under the column heading --FIRST LINE--. This can be helpful when you are searching for a particular existing template.
To select a template from the Summary Screen, type the form code when prompted and press <Enter>. You may view the form or edit it (editing information is found below). To exit the form, press the <Escape> key to access
the COMMAND LINE, type <END>.
When creating a new template, enter a 1-4 alpha numeric code for the template at the ENTER TEMPLATE CODE field (prompt) and press the <ENTER> key. Example: PLAN <Enter>
EXAMPLE SCREEN:
ENTER TEMPLATE CODE -> Type numbers or characters (up to 4
alpha/numerical characters) that will identify the form and press <Enter>.
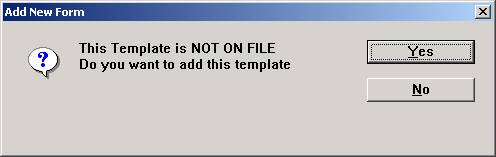
NOT ON FILE ADD? (Y=YES, N=NO): If you decide to cancel the
entry, type N (no). The program will return
you to the ENTER TEMPLATE CODE prompt without adding the form.
To add a form, type Y (yes) and press <Enter>. The screen will
prompt with ENTER FORM TYPE as shown in the example below:
EXAMPLE SCREEN:
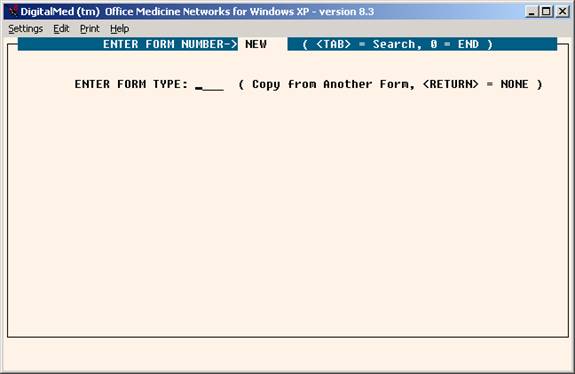
ENTER FORM TYPE: At this prompt you have the option to copy
From an existing template (form) in order to create a new
template, or you may press <Enter> for a blank screen and
design a new template using free text.
COPY AN EXISTING TEMPLATE: To create a new template by editing
an existing template. Type the code that will identify that
template at the ENTER FORM TYPE prompt and press <Enter>.
(Be sure the template is free of errors as all information on
Example: Form PF1 presently exists in your Library.
You are creating a new template (form) and want to edit
the format of Form PF2 to create this new template.
At the ENTER FORM TYPE prompt, type PF1 and press
<Enter>. The format of Form PF1 will be copied
into your new PF2 template. The original Form PF1 will
not be disturbed.
From the Command Line:
To start creating or editing a form enter “E” or simply press the <Up> Arrow.
See “Command Line Functions” for more information below.
As you edit this form, any free text will automatically wrap-
around at the end of each line.
Arrow Key Functions:
<Left> = Moves back one space at a time erasing text.
<Right> = Moves to the right one space at a time, but
does not erase text.
<Down> = Moves down one line at a time.
<Up> = Moves up one line at a time.
<Page-Down> = Moves down 1 page at a time.
<Page-Up> = Moves up 1 page at a time.
If you make an error in typing, press <Enter> and then press
the <Up> Directional Arrow key to access the line you were on.
<Right> arrow to the area you need to correct.
Control Key Functions:
Ctrl a: To add a blank line, hold the Ctrl key
down and press the letter a.
Ctrl d: To delete a line (with or without text), hold
the Ctrl key down and press the letter d.
Ctrl w: Blanks a line from the cursor to the end of that line.
Ctrl t: Inserts a blank space.
Ctrl r: Reformat a paragraph from cursor down using
cursor as left margin.
Ctrl z: Moves the cursor to the end of the current line.
The upper toolbar also provides “Copy” and “Paste” functions by clicking on the “edit” command.
To exit and save this form, press the <Escape> key to access
the COMMAND LINE then <Escape> again to save the record.
The cursor will return to the ENTER TEMPLATE CODE prompt
located at the top of the screen.
USING FREE TEXT ONLY: Here you will not be copying an existing
template to alter; you will design an original template. Enter
the characters that will identify the template at the ENTER FORM
NUMBER prompt and press <Enter>. A blank page 1 will be
displayed. You may now design a template to your specific needs.
When entering free text, it will automatically wraparound at
the end of each line.
If you make an error in typing, press <Enter> and then press
the <Up> Directional Arrow key to access the line you were on.
<Right> arrow to the area you need to correct.
Control Key Functions:
Ctrl a: To add a blank line, hold the Ctrl key
down and press the letter a.
Ctrl d: To delete a line (with or without text), hold
the Ctrl key down and press the letter d.
Ctrl z: Blanks a line from the cursor to the end of
that line.
Ctrl w: Inserts a blank space.
Ctrl r: Reformat a paragraph from cursor down using
cursor as left margin.
To exit and save this template, press the <Escape> key to access
the COMMAND LINE then type 0 (zero) and press <Enter>. You
will return to the ENTER TEMPLATE CODE prompt.
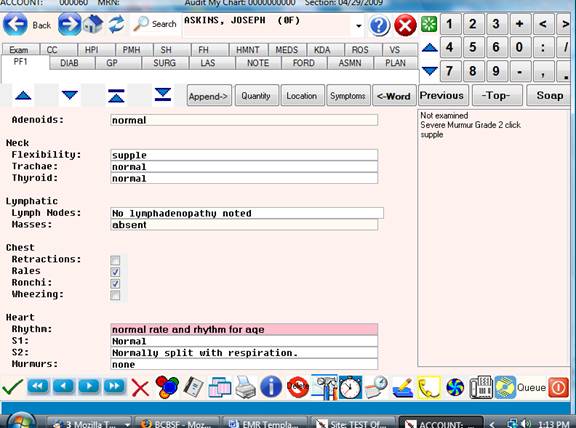
An example of a defined template is on the next page.
EXAMPLE OF DEFINED TEMPLATE:
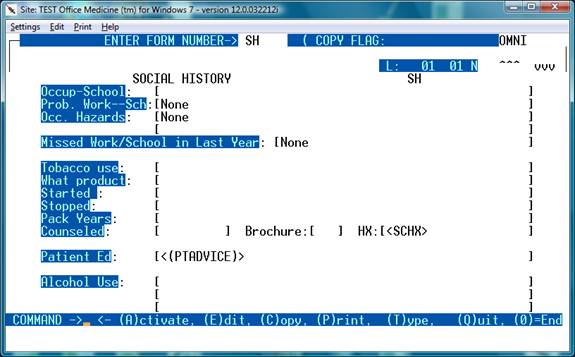
L: This indicates what line you are on in the template.
In this example, the cursor is on line 01.
SCRN: This indicates what page you are on in the template.
This example shows page 1 of the form.
To exit and save your template, press the <Escape> key to access
the COMMAND LINE, Press Escape again to save.
This template will be stored by the name you assigned it. An
explanation of the COMMAND LINE functions may be found on
the next page.
COMMAND LINE FUNCTIONS:
Example Command Line:
COMMAND -> <- (A)ctivate, (E)dit, (C)opy, (P)rint, (T)ype, (Q)uit, (0)=End
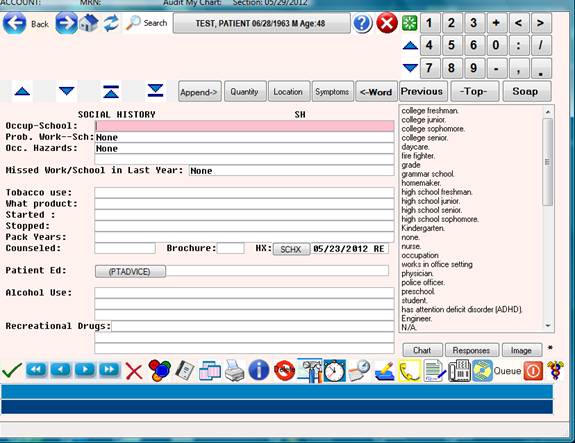
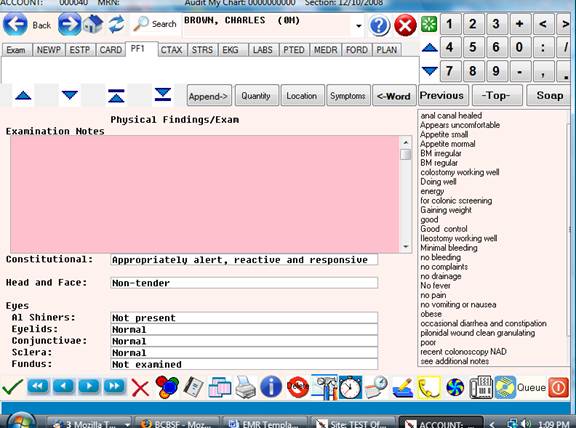
(A)ctivate: This command emulates testing of the form as used in the EMR module. Closing the EMR “ACTIVATE” window will return the cursor to the command line.
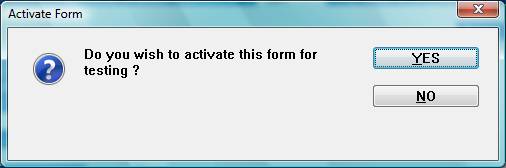
A yes response will bring up the following screen for testing the template changes.
Closing the EMR “ACTIVATE” window will return to the command line.
( C )opy: Sets the form to behave when called up in the EMR as follows:
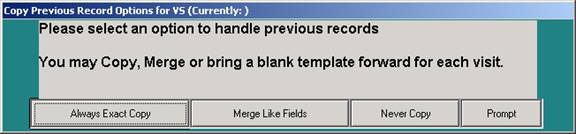
Exact Copy: Copies the exact form from the previous visit.
Merge Like Fields: Copy the matching data elements from the OLD form to the current form – If the data elements ( fields) match.
Never Copy: Just brings up the blank default form.
Prompt: Ask operator to “Copy or Merge”.
(E)dit: Places the cursor on the form so that the form may be changed by
using arrow keys to navigate around the form. Pressing the “UP” arrow key from the command line also does this.
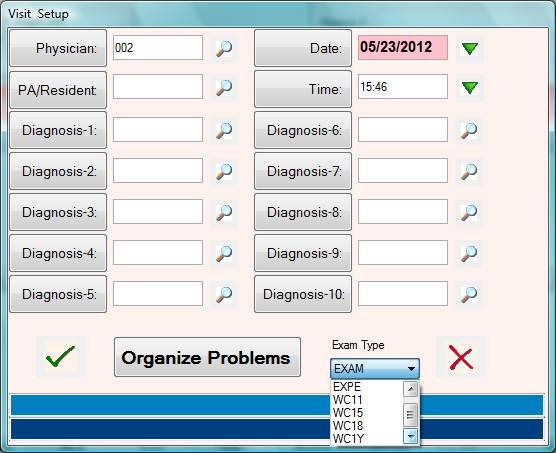
(T)ype: This will set the form as a primary exam template, or a secondary template to be used within an exam. Example: An age dependent well child visit template can be created for age specific milestones and used as a primary example template in lieu of the default “EXAM” template in the “Exam Setup” window. Most likely this function will result in too much complexity so it is recommended only for unique situations.

Exams set to primary are visible in the exam “Select Problems” setup window under “Exam Type”
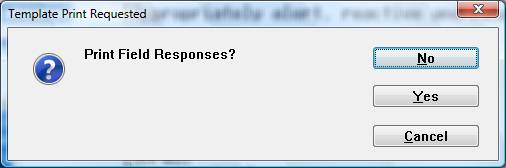
(P)rint: Type P to print a hardcopy of this page. The program
will open a window allowing you to select a printer.
There is an additional prompt to include the field knowledge base responses along with printing the form body itself.
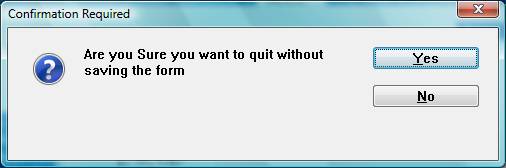
(Q)uit: This command will exit the form without saving any changes made since last saving the form.
(T)Type: This function allows setting of the templates as a primary exam template this Template will now appear under the “EXAM” selection area.
End: Type <END> key or a '0' (zero) and press <Enter> to exit and save
your template. The program will display the ENTER TEMPLATE CODE
prompt. To exit to the Medical Records Menu type <END> or O (zero)
again and press <Enter>.
Although not listed in the COMMAND LINE, you may press the <Up>
Directional Arrow key to edit the form directly. Your cursor will move to
line 1 of the document. You may arrow to the line of field to correct.
Press <Escape> to return to the COMMAND LINE.
Altering the lengths of a field:
Fields are defined by a left and right bracket. The database will store the area inside the brackets as a database field.
To make a field smaller or larger, simply position the brackets until the field is the desired length.
Adding default text to a field:
In order to add a default (automatic) answer to a field, simply edit the form and type the default test directly into the field (between the brackets)
Example:
Throat
Presence: [ ] <- Before Default
Throat
Presence: [erythematous ] <- After default
Adding drop down choices for a field:
You may add a set of choices and buttons to a given field by using the form in the Activated Mode.
- From the command line enter the command 'A' to activate the form.
- Please the cursor in the field where the choices will be added
- Enter the text for the answer, then click
the “Add Responses” icon located on the lower toolbar.

- You will be prompted to add the text to the field choices.
Example:
Throat:
Presense: [cobblestone appearance-------------------------------------]
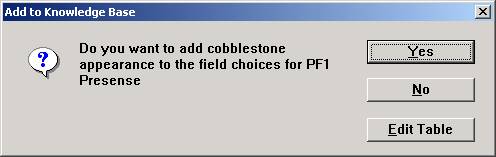
Enter 'Y' to add this response to the field list for Presence.
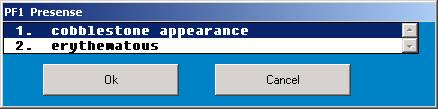
When the cursor is placed on a certain field within the template, the “ACTIVATE” mode will display the available selections in the right side selection panel specifically for that field. Clicking “EDIT TABLE” allows access to existing selections or the entire table for this field can be edited by way of the Trigger list program located as selection #4 on the Medical Records Menu.
Adding links to other templates:
To add a link to another template, put the template code inside “<” and “> characters. This will designate another form to the form compiler.
Example:
To make the template “PAIN accessible from another template, add the following:
PAIN HISTORY: [<PAIN> ]
Screen before adding template:
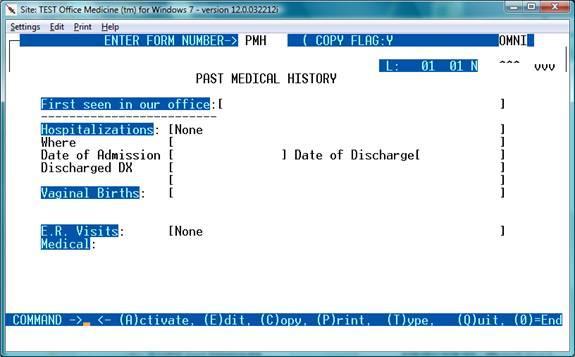
Screen after adding template:
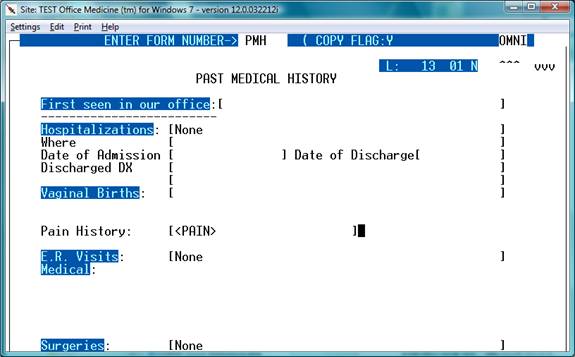
Extend the right hand bracket to approx 40 characters in length in order to accommodate time stamp and reviewing information. There is no limit to the number of templates that can be nested. ( drill down ).
Initially, templates are displayed from the “EXAM” template.
Types of fields:
Brackets: [The answer goes here ]
This creates a single line field where a non-verbose response can be entered.
Example as viewed in the “ACTIVATE” window:

Field Name:
The field name w/o brackets creates an unlimited length paragraph for voice dictation or “Word” processing type of data input. This field does word wrapping.
Be sure to leave several lines below the field for space for multiple lines ( if needed ).
Example:
Examination Notes:
Checkboxes:
Checkboxes are automatically created by use of [y] or [n]
[y]= Checked – checkbox
[n]= Un-Checked – checkbox.
Example:
Chest
Retractions: [n]
Rales [y]
Ronchi: [y]
Wheezing: [n]