Claims Correction Overview
Edit Existing Claim
OVERVIEW: After entering a charge in the Charge Entry Module located on the Main Menu Item #2 - Enter Charges, the charge ( claim ) can be edited by re-visiting the same service date and account number. The program will detect that a claim already is present and ask whether you want to correct the original charge, or add an additional charge for this date by way of the following prompt.
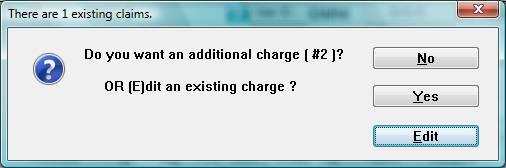
BY selecting (E)dit the existing charge, the original charge will be brought back on the screen for changes. Once you have commenced editing a charge, be sure to finish the process by “V”erifing the charge or the charge. (D)eleting the charge will be the same as UNPOSTING and the charge will be completely deleted.
Editting a charge is not allowed if the claim had already been billed and received by the insurance company. In this case a correction can be performed by using the Automated Billing procedure below.
Claims Correction Overview
Automated Billing
OVERVIEW: The Automated Billing program provides the means to review and
correct all claims entered in the computer. Blue Cross/Blue Shield, Medicare, and Medicaid claims entered for a given day can be approved and then transferred into telecommunication files or printed out as hard copy (forms). Private insurance claims without an appropriate EDI payer number MUST BE HARD COPIED after reviewing and making corrections.
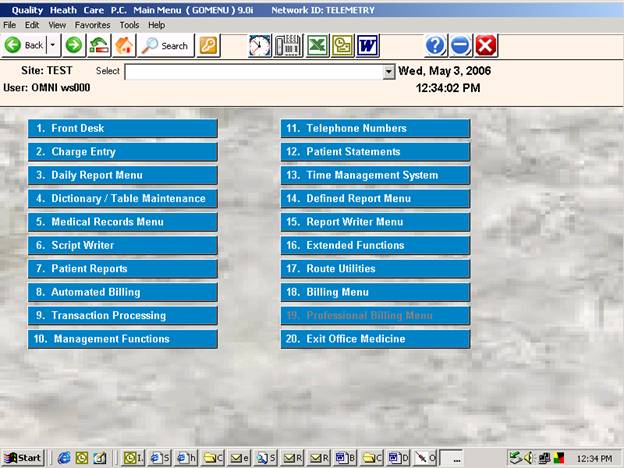
PROCEDURE: From the Main Menu select Option 8, Automated Billing,
and <ENTER KEY>.
The Automated Billing Menu, shown below, will be displayed.
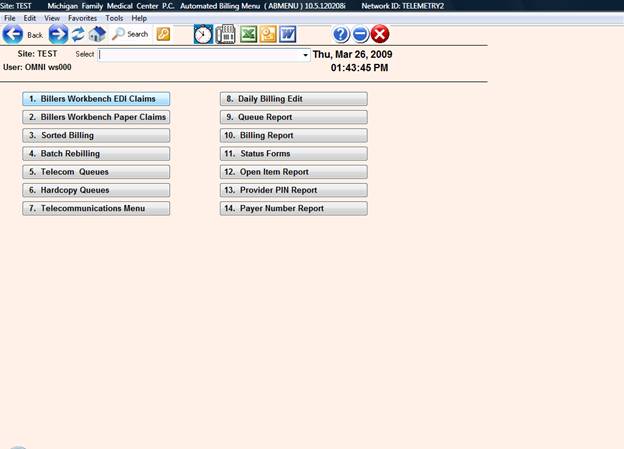
Here is a brief description of each of the items shown on the Automated Billing Menu.
1. Telecommunication Billing: Allows you to review and correct primary forms prior to their transmission.
2. Hard Copy Billing (Forms): Allows for the printing of a claim for manual submission.
3. Sorted Billing: Allows for sorting and printing by Insurance Company, Doctor, and Patient.
4. Batch Rebilling: Allows the system to scan and print a claim for all open items.
5. Telecommunication Queues: Allows you to telecommunicate primary forms at a later date.
6. Hard Copy Queues: Allows for the printing of a claim for manual submission from the queue at a later date.
7. Telecommunications Menu: Selections 1 through 7 on this menu allow for checking and sending of a file, and the receiving of a file from Blue Shield and Medicare. Selections 8 through 13 are specific to US HDI billing only.
8. Daily Billing Edit: System checks patient information for errors.
9. Queue Report: Gives you status of the queues.
10. Billing Report: Prints a list of all open claims, paid claims, and partially paid claims.
11. Status Forms: Prints a Blue Shield status form.
12. Provider PIN Report: Allows easy checking of multiple provider identification numbers
13. Payer Number Report: Allows easy checking of Clearing House Payer-ID numbers.
Each option requires the User’s ID. The system stamps the date and ID on the claims as they are billed.
You may select a particular carrier or all carriers. You can review claims by Date of Entry or by Patient Account Number for a specific date of service.
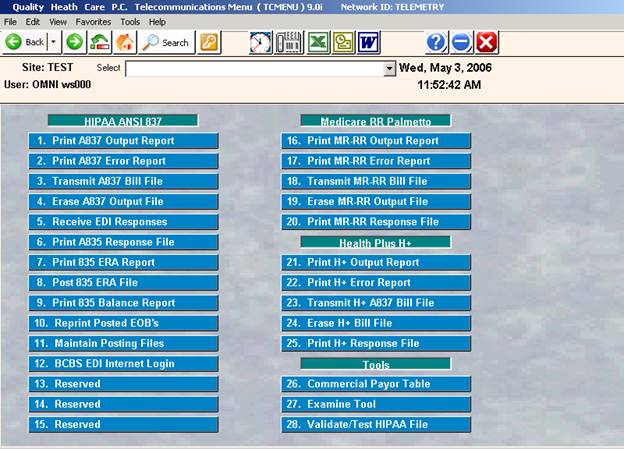
Selection 7, Telecommunications Menu, allows you to send claims to insurance carriers like Blue Shield and Medicare electronically. That Menu is shown below.
The claim record display will appear per the examples below for primary or secondary.
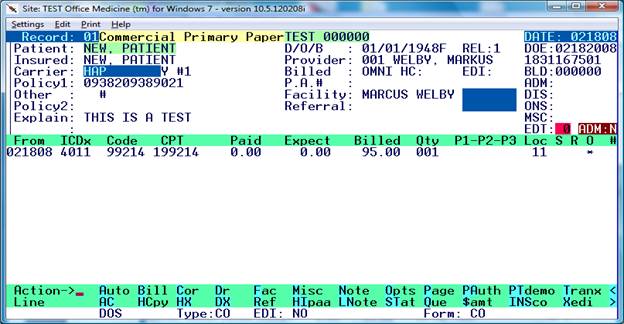
Hardcopy 1500 Screen
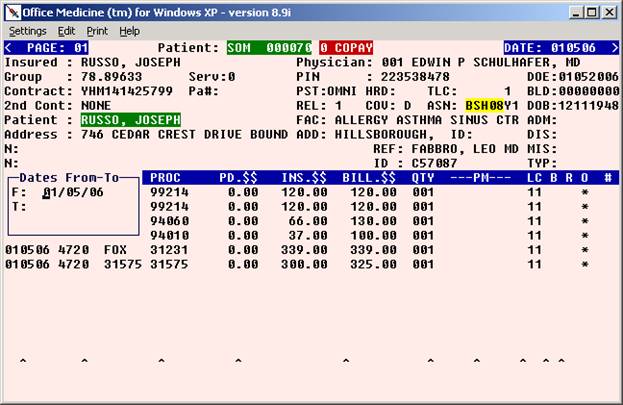
HIPAA Telecommunications (EDI) Screen

Making a correction:
1. Bring up a claim by selection a patient and service date as shown in the above examples.
2. Enter a “C” at the command line ( or Click on the CORrect Action Item located at the bottom
Of the screen.
The following screen will display:
3. You may now use the arrow keys to navigate between the lines and columns in order to correct any item on the screen.
To delete a price modifier or location, space through the field ( 2 spaces ).
4. When corrections have been made, press the <HOME> or <Escape> key to return to the command line. You may now exit the screen and save the changes by using the <Escape> Key or “0” and <Enter>.
LEGEND FOR ASTERISK PLACEMENT UNDER BRO:
If the * is placed under the B = Line has been billed out.
If the * is placed under the R = Payment has been received.
If the * is placed under the O = That line will be billed out.
Correction of Unbalanced Line Items
In the rare instance where the claim line items do not total to the ledger balance for a given service date, you may follow this procedure in order to make the claim line items balance to the ledger. This may occur when a power failure stops the transaction from processing or a hardware malfunction occurs.
- Login with a user ID having the “SUPER” user credentials.
- Select Menu Item #9 > then #4 – Line Item Posting.
- Pull up the claim that needs balancing by way of patient ID and Service Date.
- Type “EDIT” ( without the quotes ) in the ACTION command line.
The following screen will display.
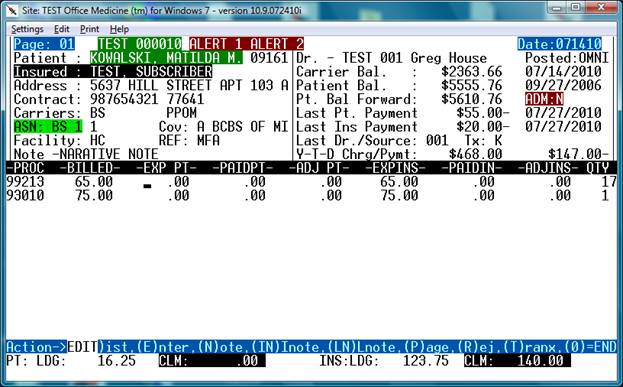
In this case, the Ledger shows a patient balance of $16.25 and the line items show $0.00
The Ledger Insurance Balance is $123.75 and the Line Items show $140.00 ( $16.25 too much )
The goal will be to make the claim line items equal to the ledger balance.
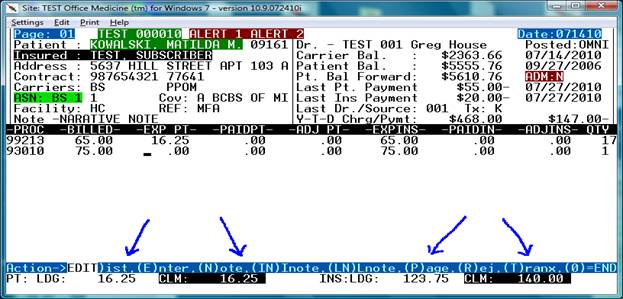
This is done by looking at the Patient “LDG” balance and Patient “CLM” balance located at the bottom of the screen. See the first set of blue pointers in the screen below:

Step 1. Using the arrow keys, move the cursor to the “EXP PT” column and type $16.25 on the appropriate line item. ( 99213)
Watch the totals change at the bottom of the screen after entering the amount.
Remember: the goal is to get the patient line items to balance to the patient ledger balance.
See the next screen below.
Now the patient line items are in balance with the ledger as the PT: LDG amount is equal to the CLM.
The next step is to balance the insurance line items to the INS LDG amount.
This may require you to subtract 16.25 from the $65.00 shown under “EXP INS” as the $140.00 balance for the item items is $16.25 too high.
Using the arrow keys move the cursor to the “EXP INS” column and type over the $65.00 with the new correct amount of $48.75 and watch the totals at the bottom of the screen.
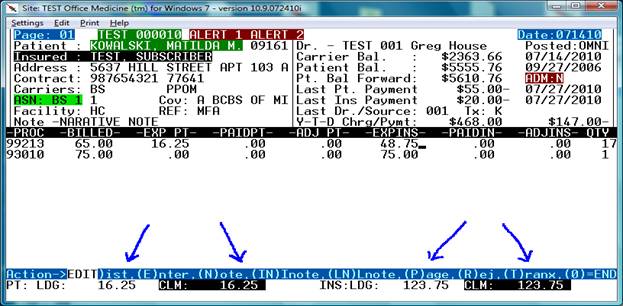
Now we can see that INS LDG and CLM amounts are also equal.
To save the corrected claim press “ESCAPE” to exit from the EDIT mode and then “0” to save.
You may also elect to not save changes by entering “Q” to quit instead of “0”.
The above example shows a transfer of $16.25 that did not complete – So we manually deducted the 16.25 from the insurance and added the same amount to the patient.
Other out of balance situations may also include where a payment failed to be shown on the line item or an adjustment is missing. This same process can be used to add the missing payment or adjustment by using the same method – which is to balance the line items to the ledger.