PHYSICIAN / PROVIDER CODES
OVERVIEW: The Physician’s or Provider's name, address, and ID
numbers must be entered for the system to generate
ANSI 837 5010 EDI claims properly. Each provider is assigned
a number for easy reference purposes.
When later dealing with billing,
reporting, accounts receivable, income statements
or other functions, the provider will be identified
throughout the system by their ID number.
Start with the number 1 (001) if possible.
The number range is (000 – 999 ) for each Practice
TRAINING NOTE: A specific provider may have multiple
Provider numbers in cases where certain lines of
business need to be reported separately.
Examples are hospital, EKG reading, Nursing Home.
However, due to the extensive reporting capabilities
Of the report writer systems, multiple numbers
for the same physician, are probably not necessary.
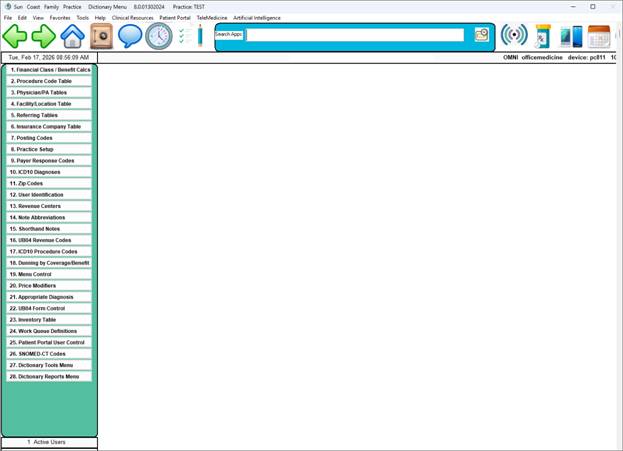
PROCEDURE: Select Option 3 from the Dictionary Menu and press
press <Enter> or Click on the item.
 ______________________________________________________________________
After you select Option 3, the screen below will be displayed.
EXAMPLE SCREEN: 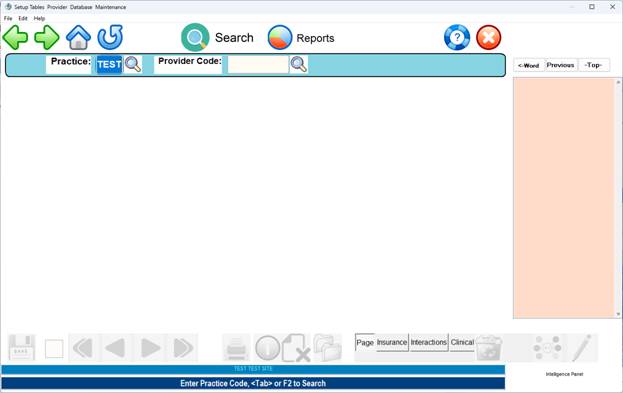
Please Enter Site Code or Tab to Search.
ENTER SITE: This designates the institution or location. This
prompt will not be displayed if there is only one location.
DR. #: Enter a three-digit number which identifies the physician
and press <ENTER>. The number "000" is reserved for the clinic's
default information. Every Site must have a DR.#000 record defined.
Remember, this must be a numeric field, no alpha characters will
be recognized. The system will prompt:
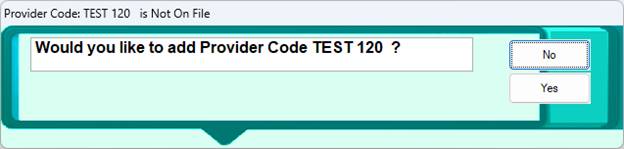
If you do not want to add this physician, or you have made
an error entering the ID number, type an N for NO and press
<ENTER>.
If you do want to add this physician, click YES
The screen on the following page will be displayed.
EXAMPLE SCREEN #1:
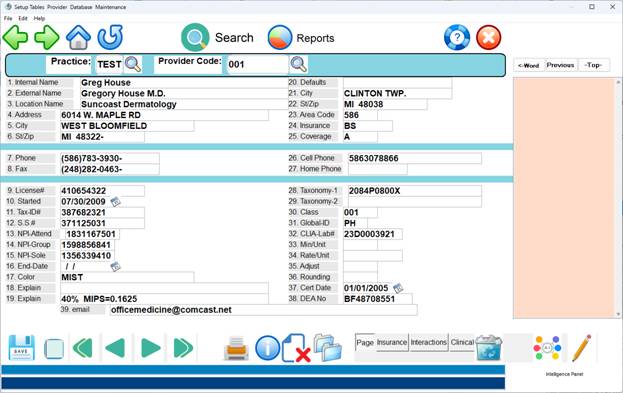
The only fields that must be completed are one through seven and eleven ( TAX ID ).
It is highly suggested that you complete the default fields in order to
Save keystrokes when adding a new patient to the system.
1. NAME-I: Enter the provider's name using the format below and
press <ENTER>. This is the name used for internal purposes.
LAST NAME, FIRST NAME
If this is a clinic with multiple physicians, you should enter the
corporate name in Fields 1 through 3.
2. NAME-E: Enter the provider's name as it should appear on
all insurance forms and statements and press <ENTER>.
3. CLINIC: Enter the clinic name and press <ENTER>. If there
is no formal clinic name, re-enter the provider's name.
4. ADDRESS: Enter the provider's/clinic's street address and
press <ENTER>. Do not use any punctuation in this field.
5. CITY: Enter the city name and press <ENTER>.
6. ST. ZIP: Enter the two-character state code, press the space
bar twice followed by the zip code and press <ENTER>.
7. PHONE-1: Enter the provider's primary phone number. Enter the
area code followed by the phone number. Do not use any spaces
between the area code and the numbers. Press <ENTER> when
completed.
8. PHONE-2: This is an optional field for a second phone
number. You may press <ENTER> to bypass it.
9. LIC #: Enter the provider's state license number
(in Michigan this number should be preceded by the provider's
first and last initials, in Florida this is an 8 digit number)
and press <ENTER>. In Michigan, if the number
is less than 6 digits, use 0 (zero) at the beginning to make
it a 6-digit number.
10. IN DATE: Since this is an optional field, you may press
<ENTER> to bypass it, or enter the date the provider joined
your practice and press <ENTER> to go to the next field.
11. IRS #: Enter the provider's tax ID number and press
<ENTER>. Do not use spaces or dashes between the numbers.
12. SS #: Enter the provider's social security number and
press <ENTER>. Exclude dashes between numbers. This SS# number
is often required for State Welfare programs and federal programs
like Tricare.
13. AMA #: Enter the provider's American Medical Association
number and press <ENTER>. Presently, this is not a mandatory
field for billing.
14. BSPPO#: This field is unique to Michigan. Enter the Blue
Shield PPO provider number and press <ENTER>.
15. HMO #: Enter the provider's HMO number and press <ENTER>.
16. OUTDATE: Enter the date the provider ceased to be affiliated
with your practice and press <ENTER>. Entering a date here
restricts the billing of a service date past this date for that
provider. This is an optional field. Press <ENTER> to skip it.
17. SP INST: This field is for any special instructions you may
have pertaining to this provider such as a beeper number, car phone
number, etc. This is an optional field. Press <ENTER> to skip it.
18. SP INST: This is a second field for special instructions.
19. DME SPN: Enter the Durable Medical Equipment supplier number.
This is an optional field, you may <ENTER> to bypass it.
20-25 FIELDS: FIELD NUMBERS 20-25 ARE FOR DEFAULTS IN THE
PATIENT INFORMATION PROGRAM. THE INFORMATION ENTERED HERE
SHOULD BE THE MOST COMMON ANSWERS FOR YOUR PATIENTS.
20. ADDR df: A default address is used if the majority of
the patients for this provider number all live at the same
address. An example would be a nursing home.
This field may be left blank if it does not apply.
21. CITY df: Enter the city that would save time as
a default for your patient’s address and press <ENTER>.
22. ST ZIP df: Enter the state and zip code of most of your
patients. If the zip codes differ greatly between patients,
you may press <ENTER> through this field and enter each
patient's zip code individually. You may put the first 3
or 4 digits of a zip code to save keystrokes.
23. AREA df: Enter the most common area code for your practice
and press <ENTER>. This area code will be entered automatically
in patient information when you press <ENTER>.
24. INS df: If the majority of your practice has the same
insurance carrier enter the insurance type and press <ENTER>.
This abbreviation will automatically be entered in Field 7,
Primary Insurance, in Patient Information when you press
<ENTER>.
EXAMPLE: BS if majority are Blue Shield
MR if majority are Medicare
MD if majority are Medicaid
25. COV df: Enter the coverage letter for the majority of
your patients and press <ENTER>. This letter will be
automatically entered in Field 22, Coverage Code, of Patient
Information when you press <ENTER>.
* NOTE: The Training staff at OMNI does not recommend defaulting
#24 and #25 for new users.
26. ANS SERV: Enter the answering service phone number of
the provider and press <ENTER>.
27. PHONE-H: Enter the provider's home phone number and
press <ENTER>. This field is optional so you may press
<ENTER> to bypass it.
28. PRM-SPC: Enter the primary specialty of the provider
and press <ENTER>. This field is optional so you may press
<ENTER> to bypass it.
29. SEC-SPEC: Enter the secondary specialty of the provider
and press <ENTER>. Optional field, press <ENTER> to bypass.
30. RANKING: Enter year of the resident. If this doctor is
identified here as a resident, in Patient Checkout you will
be prompted to enter this physician at the second doctor
prompt. You will not be able to enter this physician as a
primary doctor.
31. PHYS ID: If you have multiple numbers for a physician, and
want a sub-total amounts reported for financials, enter the
provider number or initials as a grouping code to be totaled.
32. CLIA/SITE ID: Enter the provider's 10 digit CLIA ID and
press <ENTER>. If the CLIA number is the same for all providers,
enter the CLIA ID for DR# 000 (The Default Clinic Record) only and
leave this field blank for all other providers.
33. AN M/UN: Enter the number of minutes per unit for anesthesia.
If you are not billing for anesthesia, press <ENTER> through
Fields 33-36.
34. AN RATE: Enter the dollar amount to bill per unit for
anesthesia and press <ENTER>.
35. UN ADJ: Enter the number of units to either add or subtract
for anesthesia and press <ENTER>.
36. ROUND: Enter the number of units to round off for anesthesia
and press <ENTER>.
37. Cert Date: This field is to indicate the last recording
of PECOS certification.
38. DEA ID: If transmitting e-Rx, enter the provider's
DEA ID number and press <ENTER>.
ACTION LINE COMMAND FUNCTIONS:
(D)el,(K)py,(P)rt,(N)xt,(V)fy,(F)wd,(B)ck,(0)=End
Enter #1-38: If you need to correct Fields #1-38, enter the field
number at the Action Line and press <ENTER>. The cursor will be
positioned at that field number. To return to the Action Line,
press the <Home> key. An alternate way to access the fields from
the Action Line is to press the <Up> arrow key. Using this method
you may move through the fields using the <Down>/<Up> Arrow keys.
Press the <Home> key from any field to return to the Action Line.
(D)elete: ( or Click on Red Circle)
To delete this entry, type D and press <ENTER>.
(K)opy: To copy this screen to another Provider or Site type K and
press <ENTER>. The cursor will move to the Site prompt. You may
enter a different Site or press <ENTER> to keep the same Site code.
The cursor will then move to the DR # prompt. Enter a different
DR number and press <ENTER>. The information will be copied, but
the original will not be disturbed.
(P)rint: Enter a P and press <ENTER> to print a hardcopy of
the provider information. The system will prompt you to
select an output device. Select the desired printer and press
<ENTER>.
(N)ext: (Or Click on Insurance Button )
This will take you to the next provider screen which contains
the Carrier Specific Information, PIN, GROUP and other numbers.
EXAMPLE INSURANCE SPECIFIC RECORD SELECTION SCREEN:
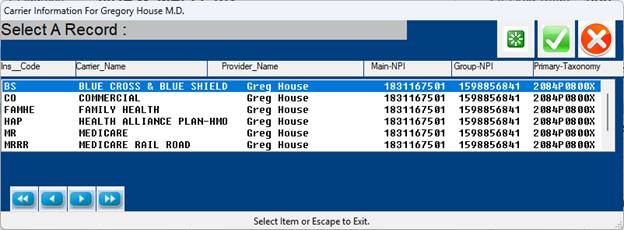
You may edit the Provider Insurance Card Database, from which the
information on this screen is pulled, by typing the line number
of the carrier and pressing <ENTER> or Click on the carrier.
You may also add a new entry to this screen by typing A at the
Prompt or clicking the ADD icon. This will add a carrier to
the Provider Insurance Card Database. When you type A (Add New
Entry), the first screen displayed will be the Provider Insurance
Card Database screen shown below.
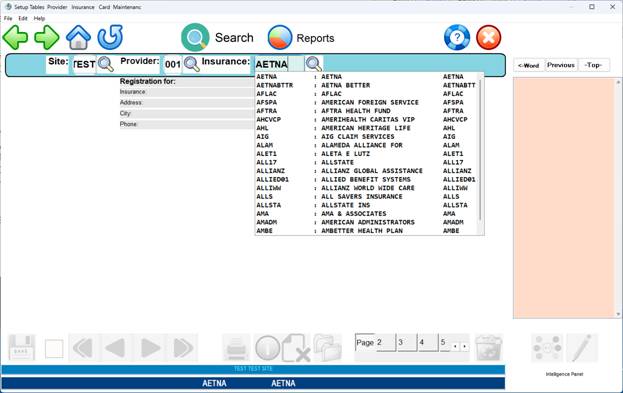
At the flashing cursor enter the insurance abbreviation and
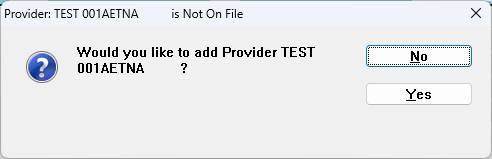
press <ENTER>. The system will prompt:
 )
)
A No answer will place your cursor at the Site prompt. A Yes answer
will display the actual Card Database screen. The INS NAME,
ADDRESS, and PHONE fields will display from entries
in the Carrier Library Tables.
On the next page is an example of the Database screen.
EXAMPLE SCREEN:
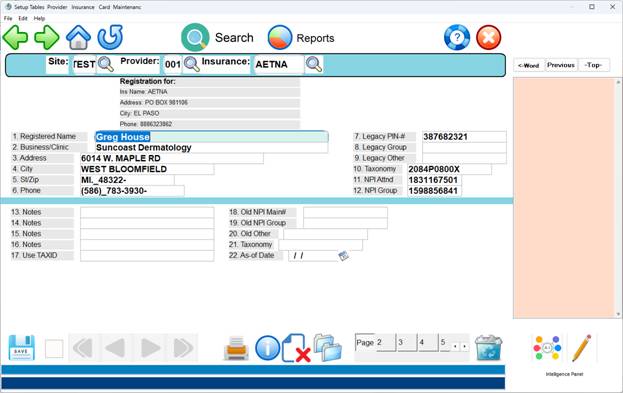
DEFINITION OF CARRIER SPECIFIC FIELDS:
1. DR NAME EXT: Enter the provider's name as it should appear
on all insurance forms and statements and press <ENTER>.
2. DR CLINIC: Enter the clinic name and press <ENTER>.
3. DR ADDRESS: Enter the provider's/clinic's street address and
press <ENTER>. This is the address any payments should be mailed
to. Do not use any punctuation in this field.
4. DR CITY: Enter the city name and press <ENTER>.
5. DR STZP: Enter the two-character state code followed by the
zip code. Press <ENTER>.
6. PHONE-1: Enter the provider's phone number and press <ENTER>.
7. DR PIN NO: Enter the PIN number and press <ENTER>. This
usually prints in Box 33 on the HCFA 1500 form. The Blue Cross
of Michigan PIN should be entered here.
8. DR GRP NO: Enter the Group number and press <ENTER>.
This number usually prints in Box 33 on the HCFA 1500 form.
9. DR 3RD NO: For Medicare, the UPIN number must go here.
You may also use this field for other numbers that a carrier
may require.
10. TAXOMONY – Enter the 10 digit Taxonomy Code
11. NPI Attening: Enter 10 digit individual NPI
12. NPI Group: Enter 10 digit NPI group.
Please note: If this provider does not have a group, re-enter
the attending NPI (#11.) in this field
13. THROUGH 17: Enter any comments and press <ENTER>. These
comments might be reminders for the receptionist and/or general
notes.
18. THROUGH 22: These fields will handle a provider number
change with the effective date of the change in field 22.
ACTION LINE DEFINITIONS FOR PROVIDER INSURANCE CARD DATABASE
(P)rt, (K)py, (D)el, Esc=END
Enter # to correct: To correct a field, enter the number of
the field at the flashing cursor and press <ENTER>. Arrow
or click over to the field to correct.
Make your correction and press the <Escape> key to return to
the Action Line Box.
(P)rint: To print a hard copy of the screen, type P and press
<ENTER>. Select the appropriate printer and press <ENTER>.
(K)opy: Type K and press <ENTER> to copy this information to
a different JOB, DR.#, or INSURANCE.
(D)elete: To delete this insurance entry, type D and press
<ENTER>. ( Click Red Circle )
(0)=End: To exit this entry and go to the Carrier Specific
Information screen, type O (zero) and press <ENTER> or Escape.
(V)erify: Displays who added this code and when. Displays who
updated this code and when. Type V and press <ENTER>.
(F)orward: Takes you forward one physician ID number.
Clicking the Right Blue Arrow also moves forward in the database.
(B)ack: Takes you back one physician ID number.
Clicking the Right Blue Arrow also moves forward in the database.
(0)=Exit: To exit and save your work, type O (zero) and press
<ENTER> or Escape. The cursor will return to the Site prompt.
You may zero and <ENTER> or Escape again to go to the Main Screen
or enter a different Site code and make another record.